Hexagons are just about everywhere in science fiction. There really doesn’t seem to be a way to get away from them. Something about their shape just screams futuristic. If you’re looking to create one in Maya you have a few options.
This tutorial will investigate three different methods of creating a hexagonal sphere in Maya. With a slant towards creating the asset for game development purposes, we will look at both the process of generating the mesh and some of the options available for texturing it.
Download the source files
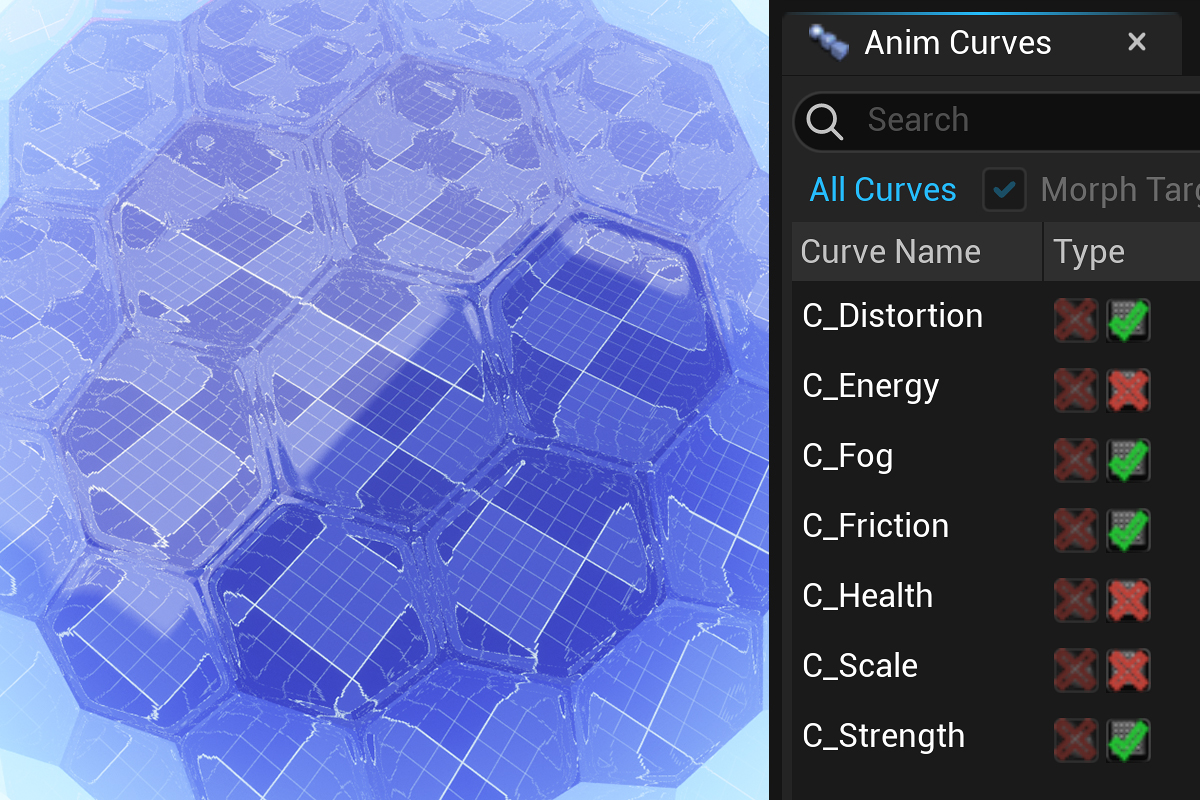
This is the first part of my ongoing series on Creating a Halo-inspired Bubble Shield for Unreal Engine 5.If you would like to access the source files from this series I would like to invite you to subscribe to my Patreon, where you will be able to download them alongside content from all current and future techarthub tutorials.
This tutorial is part of a series on creating a hexagonal forcefield asset for a game engine, so all of our practical examples throughout will be based on building a 3D mesh for real-time applications. This is just something to keep in mind as things like texture resolution and polygon count may or may not be important considerations for your own purposes.
The tools we will be using in this tutorial are not new, and these instructions should work with all recent versions of Maya/Maya LT running back for at least the last 5 years.
Let’s dive in. Here are my three methods to create a hexagonal sphere in Maya.
#1) Use a Tiling Hexagon Texture
One of the simplest methods to create a hexagonal sphere is to create a normal polygon sphere at whatever density suits your project, and apply a tiling hexagon material to the mesh.
Although this solution is quick and easy, its most obvious weakness is that no matter how you unwrap your sphere you’re likely going to have to contend with seams and/or distortion, which can really destroy the effect.
This is probably not what you were hoping to create when you started this tutorial, but I thought it was worth throwing out the possibility. If polycount is an important factor in your project, you might consider handling the hexagon shape entirely via a tiling texture.
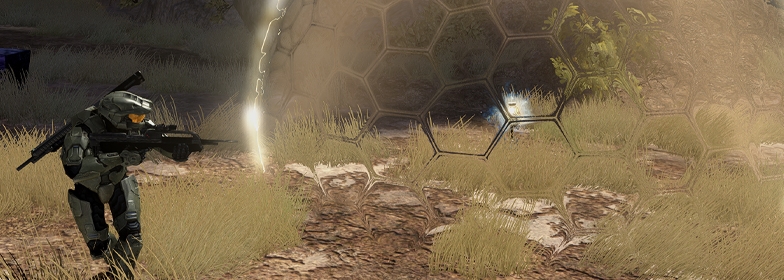
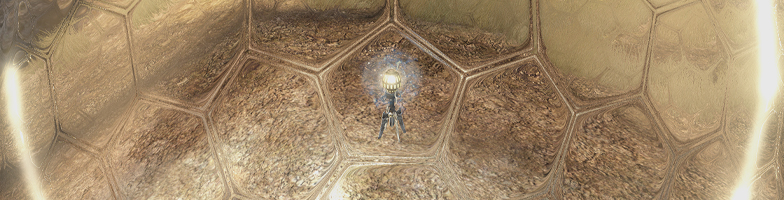
Interestingly, this seems to be the solution Bungie used in Halo 3, and you can see some of the benefits and drawbacks in the placement of the hexagons. It wraps around well, but there is visible distortion and it doesn’t always line up.
Option #2: Create a Soccer Ball
Under the Create > Polygon Primitives menu is the option to create a soccer ball, a sphere that uses alternating hexagons and pentagons. Technically called a truncated icosahedron, the soccer ball mesh is easy to create and comes with a range of automatic UV unwrapping options.

Option #3: The Platonic Solid Method
I found this method to provide the best overall result, and it’s the option I chose to generate the mesh for my Bubble Shield project. That said it’s also the most poly-intensive, so if triangles are at a premium I’d think twice before going down this route.
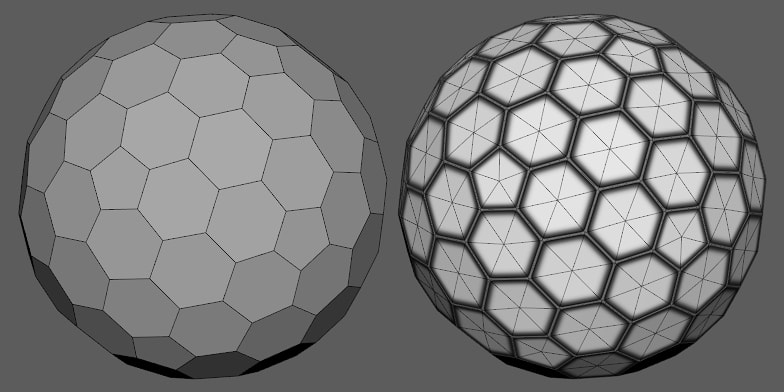
Creating the base mesh
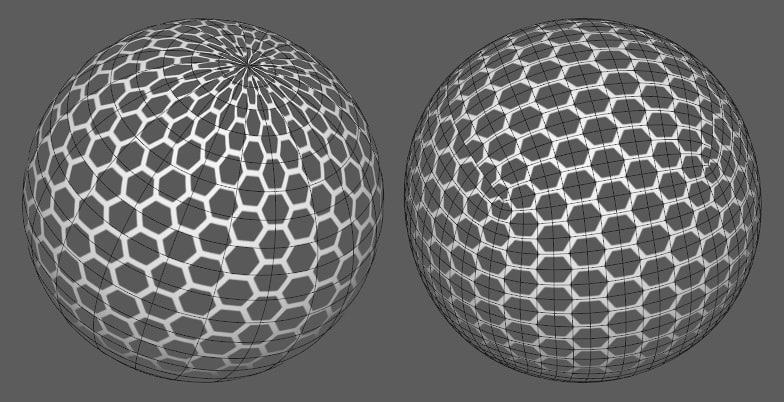
The first thing we’ll need to create is what Maya calls a Platonic Solid, a polyhedron made of faces with equal sides. When creating our solid, it gives us some options.
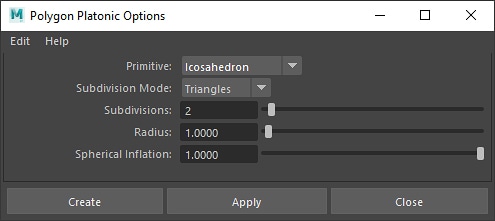
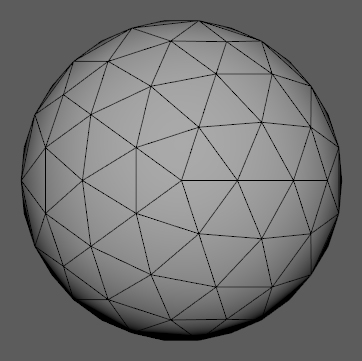
From the list, pick icosahedron (this shape is of similar makeup to our soccer ball, but it’s made entirely of either quads or tris), and select triangles. The number of subdivisions you choose to give your icosahedron will define how many hexagons there will be. This can increase your polycount very quickly, so for this example I just went with a subdivision level of 2.
Converting the the triangles to hexagons
The next step in the process is to use Maya’s smooth tool to procedurally generate the hexagon shapes across our sphere’s surface. However, before we do that we’re going to select every one of the mesh’s edge components and save them to a quick selection set via Create > Sets > Quick Selection Set.

Now select your mesh and smooth it via Mesh > Smooth. Make sure your smoothing method is set to exponential or you won’t get the right shape.


All you need to do now is right click your selection set in the outliner, select its members, and hit Edit Mesh > Delete Edge/Vertex to get rid of those original edges you no longer need.
Thank you!
Shout out to YouTuber Jamie De la Cruz Quispe and their video Maya 2018 – Basic Hexagonal Geometry for sharing this tip. It’s been such a time saver!
This process will leave us with a smooth sphere made almost entirely of hexagons. You’ll notice it still needs a few pentagon shapes to make it work, but that’s okay. They do that in Halo, too.
Turns out making a sphere entirely out of mathematically uniform hexagons is literally impossible. This post’s title was such clickbait. Sorry about that.
Texturing your (almost) hexagonal sphere
There are a few ways you could go about unwrapping and texturing your hexagonal sphere, but here is the one I chose when developing my Bubble Shield. I found it by far the most efficient method, and although it does add about 20% more geometry to your model, what you lose in performance you gain by only needing a small texture.
Adding the additional geometry
This method involves unitizing each face so that they all overlap and point in the same direction. To do this we’ll need to add some more geometry so that each tri can point towards the center of each hex.

Unfortunately we can’t rely on triangulate, so the easiest way to do this is to select your mesh and click Edit Mesh > Add Divisions to Face with the Mode set to Triangles.
Unwrapping
In order for our texture to map properly we need each polygon to overlap and face towards the center of each hexagon. This can be achieved by first automatically unwrapping the mesh, and then going to Modify > Unitize.
I found that without automatically unwrapping first, the unitization led to unreliable results.

You may need to rotate your shells, but once they’re aligned just drag that top UV coordinate across to the center and you’re done.
Creating your texture
The texturing process is a lot simpler than you might think. Since each tri is aligned facing inwards towards the center of each hexagon, we have created a form of radial symmetry. Simply drawing a horizontal line across the texture will create a hex shape on your mesh.

You can get some pretty interesting results just by playing with the placement of different hard and soft lines. For my Bubble Shield I slightly curved the edges to create softer corners, as seen in the last example.
To generate a normal map, I used Photoshop’s Generate Normal Map feature to create a base, and just played around with the levels from there.

Wrap up
That’s all I’ve got for this tutorial, thanks a lot for reading. I’ve been thinking about this one for the longest time, and it’s really what I wished I knew back when I started. I hope it fulfils all of your futuristic hexagonal needs.
Coming up next
This is my first multi-part tutorial series and I’m super excited to finally share it with you all. I hope you’ll join me in the next one where we’ll be jumping into Unreal Engine to create a refractive Forcefield Material we’ll be applying to our mesh.