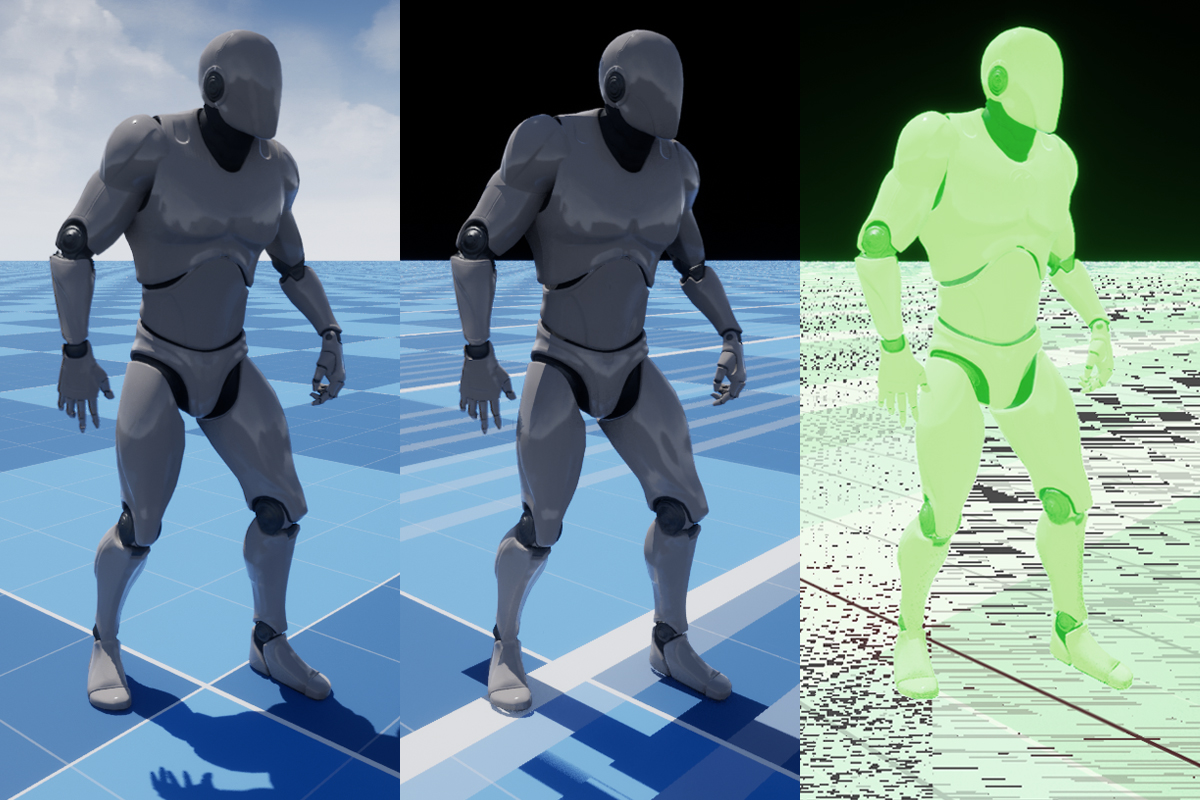
Custom Attributes are a powerful and hassle-free way of importing animation data from a range of digital content creation packages into Unreal Engine. They have a wide range of practical applications, from being the driving force behind your real-time VFX set pieces, to directly modifying game logic at runtime.
Creative use of Custom Attributes will completely change the way your game responds to your animation.
Custom attributes created in Maya can be imported into Unreal Engine as Animation Curves using the fbx format. This process is not complicated, and will convert any valid custom attribute that is attached to a skeletal mesh’s joints into a corresponding float curve. This Animation Curve is stored in the imported mesh’s skeleton asset.
As you likely already know, the FBX format is incredibly versatile and it is one of the cornerstones of 3D content production for Unreal Engine. Although the pipeline from Maya to Unreal Engine can get a little complicated, for our purposes there are only a few steps involved to bring your custom attributes across.
As far as I know this procedure will work in any version of Maya that can export to the fbx format, including both the educational versions and Maya LT.
Creating a custom attribute in Maya
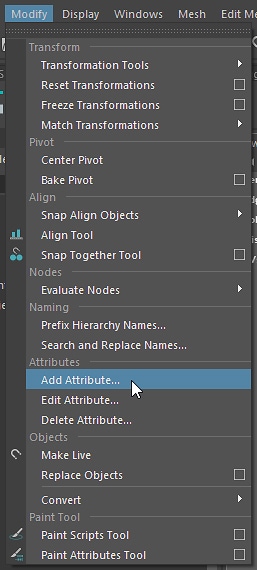
Creating a custom attribute in Maya is just a matter of selecting the object to which you want to attach the attribute and selecting Add Attribute from the Modify menu.
When creating your custom attributes, keep mind that in Unreal Animation Curves are stored inside the Skeleton asset. This means the engine will only import custom attributes if they are applied to a joint/bone. Just for convenience, I would highly recommend that you attach your custom attributes to your skeleton’s root joint, but that’s up to you. As long as they’re attached to a weighted joint they’ll come across.
It’s also important to take note that Unreal will only import custom attributes if they have animation data. Even just one keyframe somewhere on the timeline is acceptable, as long as there is something there to import.
Side note
If you’re not using joints inside Maya you can still import your fbx file as a skeletal mesh. When this is done Unreal will create virtual bones for you (well, it’ll at least try), and it should import any custom attributes assigned to those meshes as well.
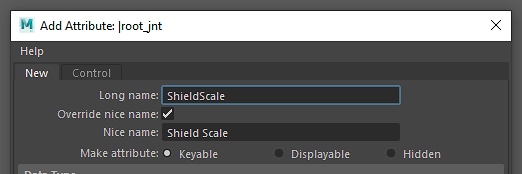
Before you can apply your custom attribute you’ll need to provide it with both a long name and a nice name. In Maya the long name is the actual string which identifies the attribute. The nice name is simply an easier to read version used in the Channel Box to make it more animator-friendly.
Unreal will use the attribute’s long name when creating its accompanying Animation Curve, so make sure you name it something recognizable.
All you need to do now is pick the type of data your custom attribute will be. Maya provides a range of types but not all of these will be accepted by Unreal’s animation importer.

The following table is a breakdown of each of Maya’s date types for Custom Attributes, and how Unreal will (or won’t) interpret them. Basically, if Unreal can convert the value to a float, it will. If it can’t, it’ll ignore it.
| Maya Custom Attribute | Unreal Animation Curve |
|---|---|
| Vector | 3 float curves (with suffixes _X, _Y, _Z) |
| Integer | Float curve (values between keyframes will be interpolated) |
| String | Ignored |
| Float | Float curve |
| Boolean | Ignored |
| Enum | Ignored |
Exporting your custom attributes to fbx
Once you’ve created your custom attribute(s) and added the animation data you need, it’s time to export them out within an fbx file. Select your mesh and skeleton (or just the skeleton if you just want the animation) and select File > Export Selection.
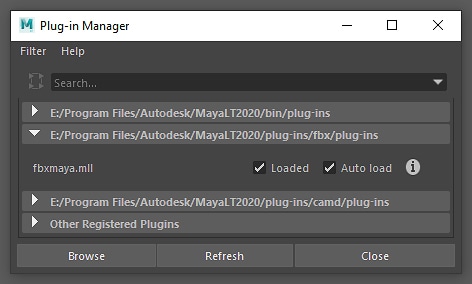
If you don’t see fbx in your list of available formats jump into your Plug-in Manager and make sure fbxmaya.mll is loaded.
The skeletal mesh pipeline from Maya to Unreal is complex and multifaceted, but for our purposes there isn’t much to it. To import your custom attributes you just need to make sure that the Animation checkbox is ticked, and that you have enabled Deformed Models/Skins.
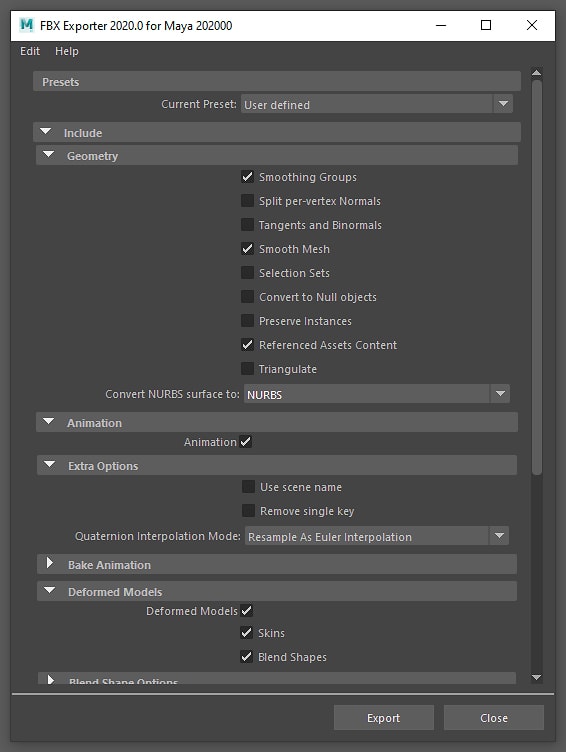
The rest is up to you, but if you’re using the default Autodesk Media and Entertainment preset, I also recommend turning on Smoothing Groups up at the top of the list so your mesh normal information will match your Maya scene.
Importing your asset into Unreal
Jumping out of Maya and into Unreal Engine now, hit the import button within your Content Browser and select your new .fbx. This will open up an import dialog with a wealth of options. The ones relevant to us are in the Animation section.
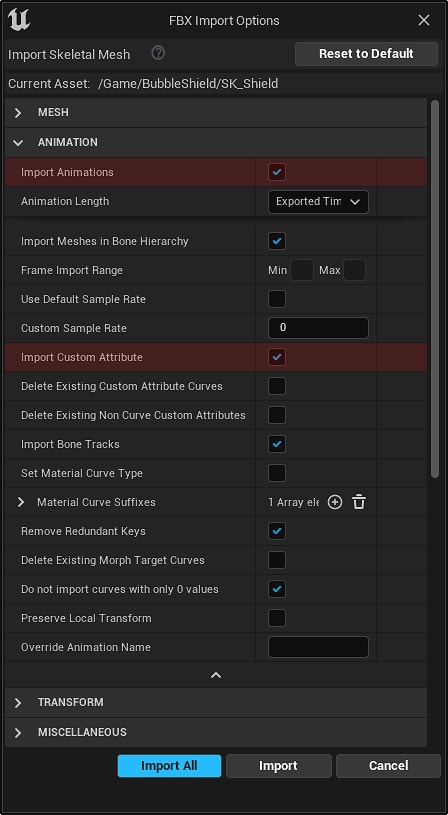
Even though your custom attributes are attached to your asset’s skeleton, you will still need to check the Animation box, or Unreal will ignore them.
The Import Custom Attribute box will also need to be checked, for obvious reasons.
The FBX import panel also includes some optional settings that will affect how your custom attributes are interpreted:
Delete Existing Custom Attribute Curves
If set to true, this setting will delete all Animation Curve data on import. This means if you re-import the asset, it will wipe all existing curves and replace them with those stored in the fbx file.
If using this setting remember to think twice before re-importing, especially if you’ve made any modifications within Unreal’s Animation Curve Editor.
Set Material Curve Type
If this box is checked then all of your imported attributes will be automatically set as Material Curves, and will automatically pass their values on to the Materials you have applied to your mesh.
Do not import curves with only 0 values
By default Unreal will not import empty curves (those that are just a flat line with a value of zero) just to avoid the accidental import of a mess of unwanted curves with no data attached.
If you’re looking to bring in a custom attribute that only has a value of zero, you’ll need to uncheck this one.
Wrapping up
That’s all there is to bringing in custom attributes from Maya. I hope I’ve helped you figure out the process, and if you have any questions or suggestions for other techniques or things I’ve missed please drop me a message! I’d love to hear from you.
Further reading
If you’re interested in learning more about the Unreal side of Animation Curves, and how they can be used to empower your character animation, VFX, and gameplay, you’re in luck. I’ve just written a primer on that very subject! Follow this link to read more about working with animation curves in Unreal Engine.