In this tutorial we’re going to be creating a procedural Material that will project a customizable grid in world-space onto any surface. This Material features options for multiple grids, different line thicknesses to create subdivisions, a configurable checkerboard pattern, and some other useful features for blocking out your levels.
My goal in creating this Material is to provide a simple, yet powerful tool that allows designers to comfortably get an idea of scale as they prototype their levels. It needs to be easy to use, customizable without needing dozens of parameters, and be entirely procedural so it can operate at any scale.
Download the Unreal project
If you’d like to have a closer look at the files I created for this tutorial you can find them in the project’s GitHub repository. If you’re looking for the Unreal Engine 4 version, you can find that here!If you’re also a Unity developer you may be interested to know that I have just finished a variant of this shader for both the URP and HDRP which you can read about here!

I’ll be starting this Material from scratch in a new project, and I will do my best to explain my thought process as we go so you can better understand how it works and modify it to suit your own needs. If you’re already familiar with Materials of this kind and you’d just like to see how this one differs from others you may have worked with, here is the graph in its entirety.

Using the Material
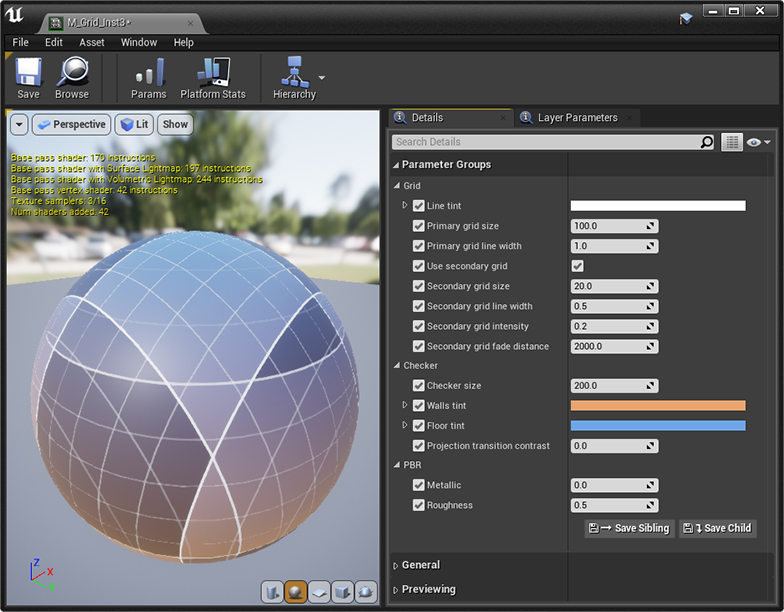
Grid
| Parameter | Description |
|---|---|
| Line tint | The color of the Material’s grid lines. |
| Primary grid size | The size of the grid in centimeters. By default this is set to 100, spacing the grid lines 1m apart. |
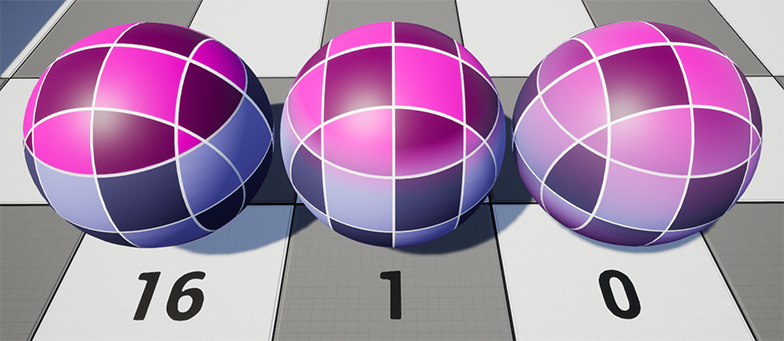
| Primary grid line width | The thickness of the primary grid lines. The strength of the lines that intersect the origin will be double this width setting. |
| Use secondary grid | This setting will enable/disable a secondary set of grid lines. By default this is set to true because subdivisions are sexy. |
| Secondary grid size | The size of the secondary grid in centimeters. Set to 20 by default, making a 5×5 grid within each primary cell. |
| Secondary grid line width | Set to 0.5cm by default. |
| Secondary grid intensity | This value sets how visible the secondary grid lines are to help with visual clarity. A value of 1 is fully opaque, whereas 0 is visually the same as disabling the secondary grid entirely. Its default value is 0.2. |
| Secondary grid fade distance | The distance from the camera at which the secondary grid will be fully faded out. This is to avoid any ugly flickering artefacts that may occur when Unreal tries to draw pencil-thin lines at a distance. By default this is set to 2000cm. |
Keep in mind
This Material doesn’t use Unreal Units so these values won’t change if you modify your measurement settings. For more information check out my article on scale and measurement inside Unreal Engine.
Checker
| Parameter | Description |
|---|---|
| Checker size | The size in centimeters of one iteration of the checker pattern. |
| Wall tint | The color of the Grid Material when applied to vertical surfaces. |
| Floor tint | The color the Grid Material will be when applied to horizontal surfaces. |
| Projection transition contrast | This value will dictate how much the Material should blend between horizontal and vertical surfaces. The higher the value, the harsher the transition. By default this is set to 0, which means on sloped surfaces the colors will evenly blend into each other. |
Getting started
In your project of choice (I am using versions 4.27 and 5.2 but I am confident the Material will work in earlier iterations of the engine) create the following assets.

- A new Material called M_Grid.
- Two new Material Functions. Name them MF_Checker, and MF_GridLines respectively.
If you’re not familiar with Material Functions, think of them as reusable pieces of shader code that can be used (and reused) without having to copy/paste a large number of nodes every single time. They’re super useful, and we’ll be using them extensively in our Material because I want it to be easily expandable. Follow this link for more information on Material Functions.
MF_GridLines
Our first Material Function is going to create a customizable set of lines at regular intervals in world space. We’ll use two instances of this function in our Material to create the primary and secondary grids.
It’s not a big graph, but it does a lot of important math. The first section generates our world space grid by dividing the drawn pixel’s world position by an arbitrary input grid size, and then multiplies the remainder by itself. That gives us something that looks like this.

of 100 and a Line Width of 1.
This is really close to what we need, except there’s a problem. At certain world space positions where a mesh face is parallel with a line on the grid, there is a lot of strange flickering going on. For example, the top face of this cube is sitting along a line of the grid. Unreal is really confused as to what to draw so it’s trying to draw two things at once.

Luckily, Epic has solved this one for us already inside one of their inbuilt Material Functions called WorldAlignedTexture. If you take a look inside this function (you can search it from the node list inside your Material Editor) you can see they project each direction separately and then blend them back together based on the direction of the vertex normal. This is the behavior we want, and so we’ll implement something similar.

The section Creating masks based on vertex normal in MF_GridLines does the same trick. It provides two masks: One for if the vertex normal is facing up or down using the blue channel (Z axis), and another if it is facing forward or back using red channel (X axis).
Further reading
For more information on how to find position and direction from these values check out my guide to Unreal Engine’s coordinate system.
The final section splits out the three projections we need, and then blends between them based on the vertex normal masks. This ends up with a grid that works in any direction, even when applied to complex objects.
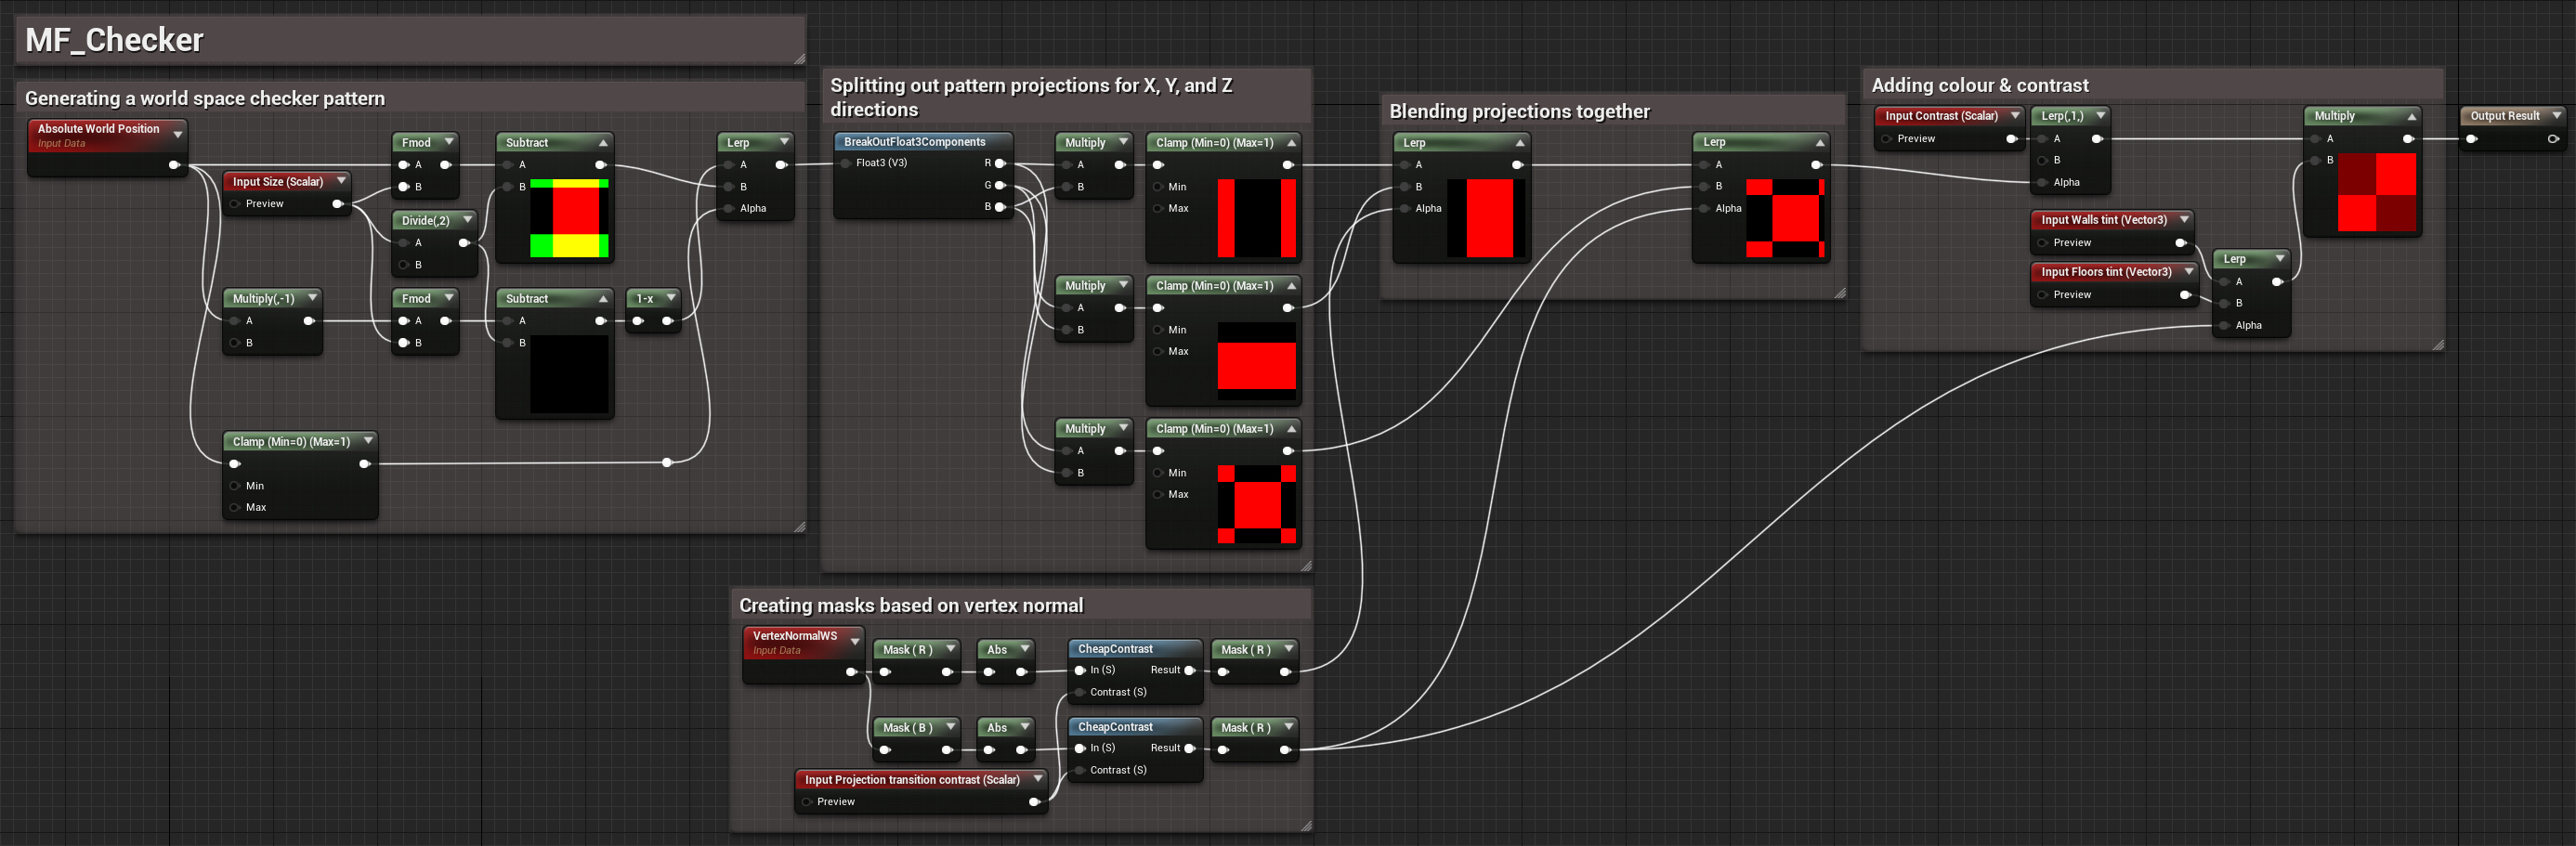
MF_Checker
This function is a little more advanced but uses the same principles.
You can copy/paste the first section from MF_GridLines, but some additions are necessary to get the functionality we need. Instead of generating a set of grid lines this version will create a checker pattern that is half the size of our arbitrary size input. We’ll need to remember this for later.
The rest is a variant of our previous graph where we split out three different projections, and then recombine them using our vertex normal mask. It’s important to note that the mask now has an additional projection transition contrast scalar input value. This will adjust the contrast of the masks, changing the harshness of the transition between projections.

The last thing we need to do in this function is to add some color variation. I added in two color inputs and a lerp node that will make every second square in the checker pattern about half the intensity of the first.

I like how this looks so I’ll be leaving it as-is, but you could make this value a parameter if you wanted.
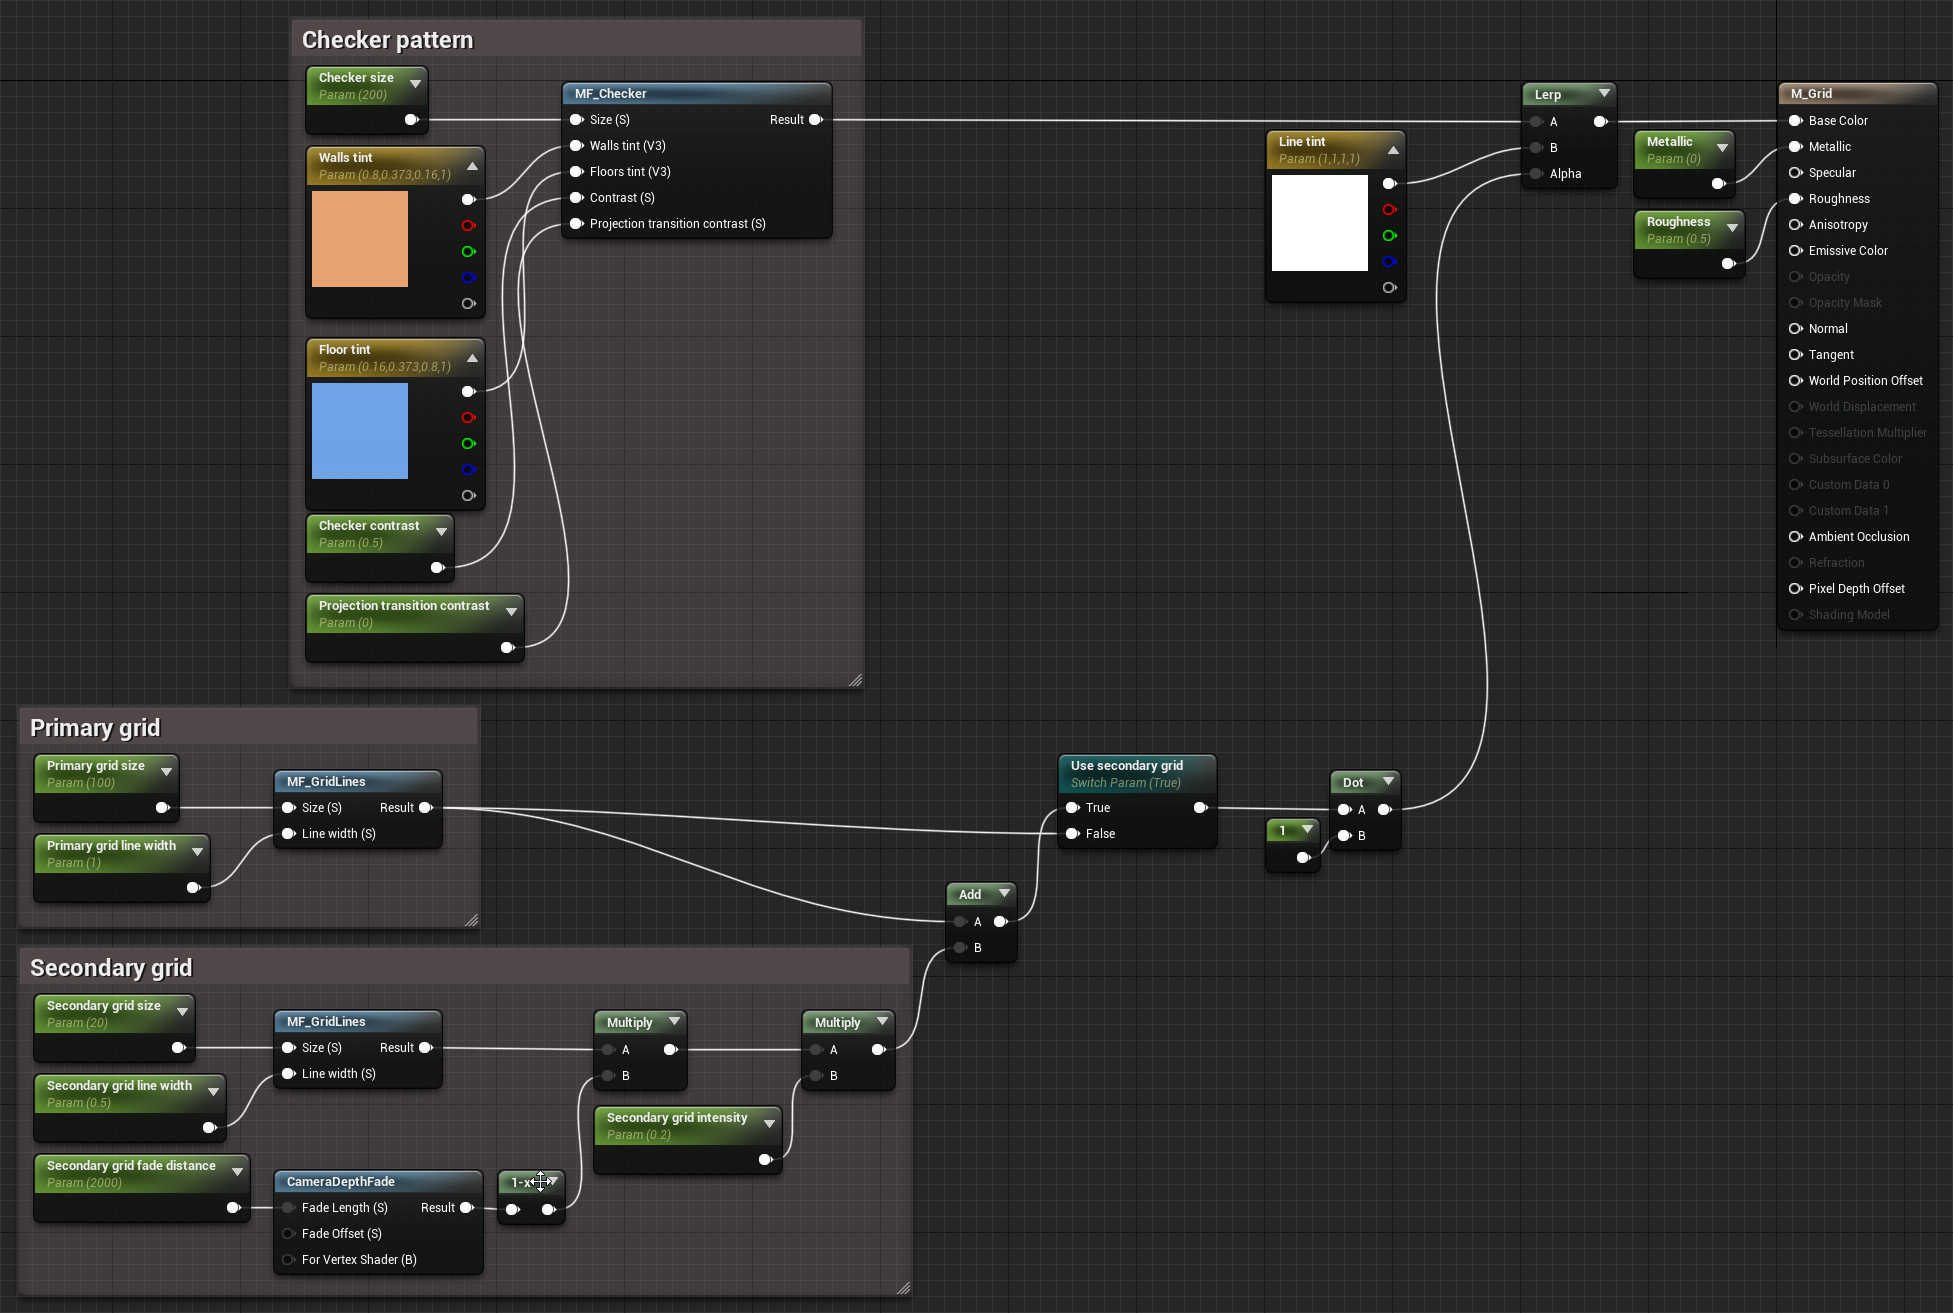
Bringing it all together
We can finally start making our actual Material. This is mostly going to be a case of dropping in our functions and creating the parameters to control them. The Material has three sections and some connective tissue. Here is the finished graph.
The Primary grid section is just one of our MF_GridLines functions with two scalar parameters for controlling its size and line width.
The Secondary grid section is similar, but also includes a few extra nodes. One of these is a CameraDepthFade function which sets the distance from the camera at which the subdivision lines will fade out. I will only be working with the Fade Length input and leaving the rest at default, but you could parameterize the other values for more control if you wanted.
The Checker pattern section is even more simple and just requires the addition of some parameters to control it. You could use the same values I have chosen or pick your own.
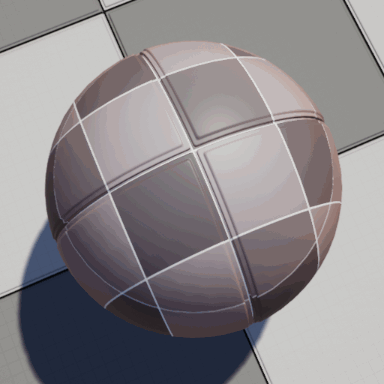
Performance
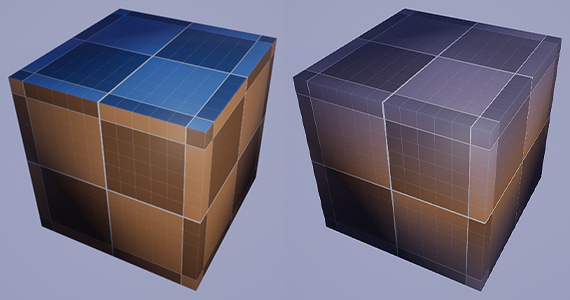
This procedural Grid Material will work at any scale and with any mesh. It uses very few texture samplers and will be a very efficient tool to help you block out your levels. If you’d like to reduce the instruction count even further, you can set the Material to both Unlit and Fully Rough in the Material editor details panel.


(top) and unlit versions of the Material.
I hope you found this tutorial interesting and informative, and that it helps you with your level blockouts. Thanks for reading, and good luck with your projects!
Frequently Asked Questions
How can I make the grid move or rotate in local space?
If you’d like your Grid to move and/or rotate with the object to which you’ve applied the Material you’ll need to transform the Absolute World Position with a few extra nodes.

In the graph above I am subtracting the Actor Position from our existing Absolute World Position node, which will lock the center of our grid to the location of our Actor. Those coordinates are then multiplied by the Object’s scale to ensure the grid keeps its spacing no matter its size.
Finally we use a TransformVector node to translate our coordinates from World Space to Local Space, which will make the grid rotate with our object.
Quick update!
The latest version of the Grid Material that you can download via both the assets page and GitHub includes a version that supports a local space grid.

I am using smoothed normals and the grid looks weird, help!
If your mesh has smoothed vertex normals you might notice that the grid shader blends the colors of the checker pattern, even for acute angles. You may also notice some ugly flickering as the grid lines blend into each other. Not great!
A simple way to fix it is to get the Material to generate its own vertex normal information. In this example I am using a static boolean parameter to switch between the mesh’s vertex normals and a set of generated hard-edged ones.