Within a Unity project there are certain asset types which tend to make up the bulk of the space both in memory and on disk. For most projects textures are among the biggest culprits, having a heavy impact on both build size and how much memory is needed to run the game efficiently.
Luckily there are many ways to minimize this impact.
Unity offers a wide selection of texture compression formats which will reduce the size of your texture data without a noticeable compromise in graphical fidelity. It also offers preconfigured presets and quality options to streamline the optimization process.
Unity’s texture compression settings are intended to give the user full control over how their texture data is handled by the engine. One consequence of this approach is that sometimes there isn’t much guidance as to which format is right for your project.
It’s my hope this article acts as a primer to help you understand why texture compression is important, how it works, and what options are available to you.
Table of Contents
What is texture compression?
Texture compression is a term used to describe a range of techniques that aim to reduce the memory footprint of your textures by removing excess/expendable data. When a texture is compressed the system will use an algorithm (or a series of algorithms) to reduce its size by removing information deemed as lower priority.
Compressing images for real-time application is not as simple as other methods of image compression you might encounter, like saving a .png or .jpg file out of Photoshop. As the engine doesn’t always know ahead of time what parts of the texture will be needed, it needs to be able to start reading data from any arbitrary point in the file. This capability is called ‘random access’, and it’s a crucial part of the graphics pipeline. Unfortunately this means that some of the most common texture compression formats you might be familiar with are not available in a real-time environment.
Like other methods of image optimization, however, there is always that tradeoff between the amount of data stored in the file and its graphical fidelity. This is a sliding scale, and it’s one of the decisions you’ll need to make to meet both your project’s creative and technical goals.
Why is texture compression important?
Your computer has a finite amount of hard drive space, memory, and patience. Textures are large binary files which will have a significant impact on your game’s performance, especially as they’re loaded in and out.
For example, an uncompressed 24-bit RGB 1024×1024 texture map is 4MB. That might not sound like much, but if you’re using several texture maps per object this can jump into the hundreds of megabytes very quickly. Moreover, if your game world is sufficiently large the engine will have to have all of this data loaded at the same time.
Texture compression helps alleviate this load by cleverly reducing the amount of data in each texture, improving performance and hopefully leaving room in the budget for other things, like the rest of your game!
My demo textures
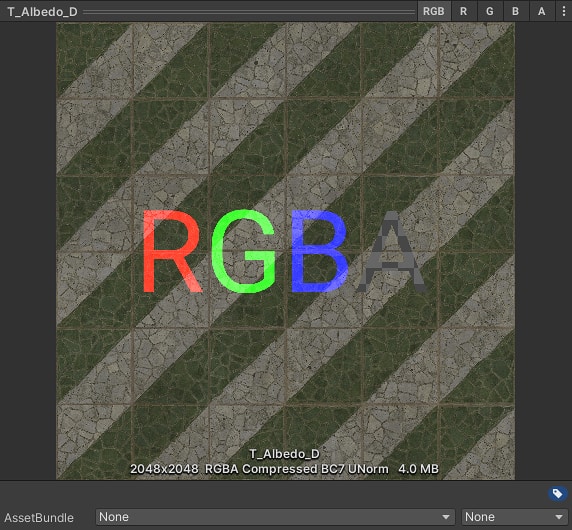
Throughout this post I’ll be using some simple textures to illustrate the different settings we’ll be exploring. I hope they’ll be able to give you an indication of the kind of visual fidelity to expect. Keep in mind that anything you see here will have an additional unavoidable layer of jpg compression so it won’t be 1:1.
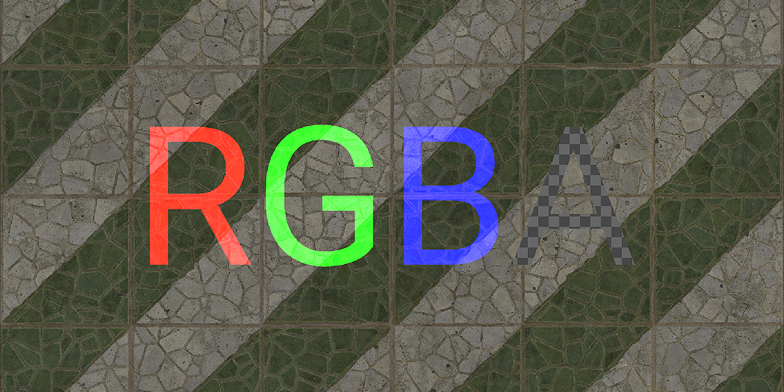


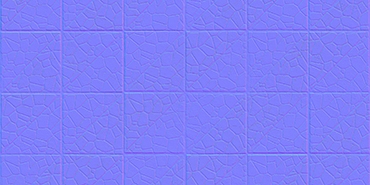
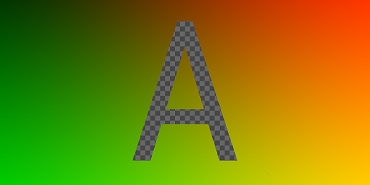
All of the screenshots and statistics in this guide are from an installation of Unity 2021.2.
What is color/bit depth?
The color (or bit) depth of an image describes how many bits of data are being used to store the color value of each pixel. The greater the bit depth of an image, the more colors there are available for use (but not necessarily present). These bits are usually distributed across multiple channels to produce the final color.
This concept is not only relevant to just game development, but the entire field of computer graphics. If you’re interested in understanding how digital images are presented, take some time to research how the color depth of an image will change both its size and appearance.

Here are some common color depth formats you’ll find in game development. I’ll be referencing back to these regularly.
| Depth | Distribution | Colors |
|---|---|---|
| 8-bit (RGB) | R3 G3 B2 | 256 |
| 16-bit (RGBA) | R3 G3 B2 A8 | 256 + alpha |
| 16-bit (RGB) | R5 G6 B5 | 65,536 |
| 24-bit (RGBA) | R5 G6 B5 A8 | 65,536 + alpha |
| 24-bit (RGB) | R8 G8 B8 | 16,777,216 |
| 32-bit (RGB) | R8 G8 B8 A8 | 16,777,216 + alpha |
Changing your texture compression settings
When looking at any texture file inside your Inspector panel, you’ll see a range of configurable parameters that will let you change how the engine interprets the image. The information relevant to compression is contained in the box at the bottom, but the scope of this article is going to be limited to the Format, Compression, and Use Crunch Compression options.

Using Overrides
By default, the texture compression settings you choose in the inspector will be applied to every platform to which your game can be built. You can override these settings per-platform by using the tabs across the top.

If you’ve not installed the appropriate packages to build for a specific platform, that platform will not appear in this list.
Compression quality
By default, Unity will use a compression format profile called Automatic.
This isn’t a specific compression format, but rather an instruction to Unity to apply whichever format it thinks best for the specific image and your target platform. This will be different from platform to platform, and each will support a different selection of formats.
Although the Automatic profile can’t be directly configured, you can use the Compression setting to guide the engine as to the quality bar you’re aiming towards.
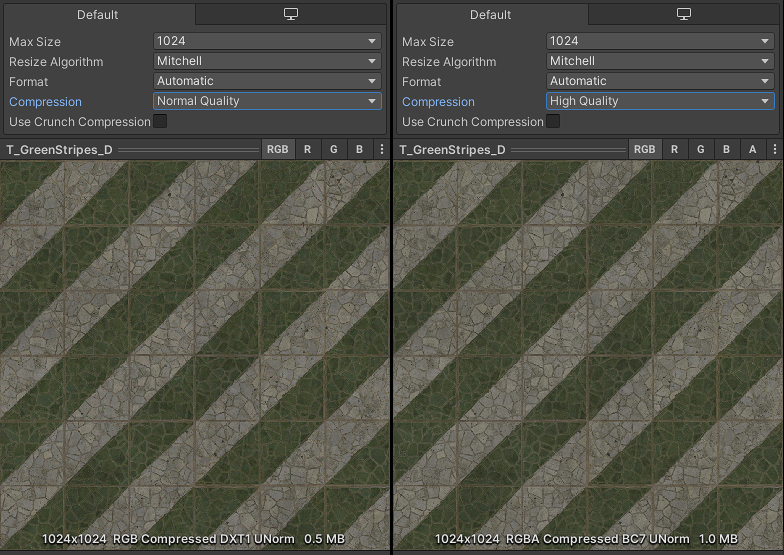
In this example, changing the Compression setting from Normal Quality to High Quality means an increase of 0.5MB and a change in compression format from BC1 to BC7, bringing a higher level of graphical fidelity at the cost of double the amount of stored data. (In this case it’s also because BC7 adds an 8-bit alpha channel whether you want it to or not!)
You can view a list of the default compression formats for each quality level in the first table on this page of the Unity Manual.
Compression formats
Unity provides a vast range of different texture compression formats, each one designed to satisfy a particular need and/or use case. Their names are not always easy to decipher, but they all follow a pattern and with a little experience you’ll find they quickly start to make sense.
Unlike Unreal Engine, Unity does not feature a collection of purpose-built presets to narrow down your choices. It instead, depending on your target platform, presents between 20 and 36 different compression formats to choose from. Unity seems to have a little more faith in your capacity to make decisions, and gives you a little more control.
Further reading
To keep things simple, we’ll be looking at the different types of compression format you’ll encounter without getting too deep into the nitty gritty of how each one compares to the other.If you’re interested in a more comprehensive breakdown of the numbers behind each format, you’ll find it in my Unity Texture Compression Cheat Sheet.
Uncompressed
The highest quality and largest file size.
The easiest place to start is with the formats that do not remove data from your image. These files are huge but provide the best possible quality. One of the most common use-cases for uncompressed textures is for user interface elements.
Although the temptation to just choose the highest possible texture quality every single time may be strong (especially if you authored the textures yourself) you should always try to use uncompressed textures as sparingly as possible. They will have a significant impact on your game’s performance.
The uncompressed formats that Unity makes available include:
- R8
- Alpha 8
- R 16 bit
- RGBA 16 bit
- RGB 16 bit
- RGB 24 bit
- RGBA 32 bit
- RGB 48 bit
- RG 32 bit
- RGB9e5 32-bit Shared Exponent Float
- RGBA Half
Block Compression (BC|DXT)
A good compromise between quality and performance.
One of the most common forms of texture compression, Block Compression (Also known as S3 Texture Compression and previously as DXT) works by breaking your image into 4×4 pixel squares and approximating their values. This method works really well for noisier images (like photos), but may cause noticeable square artifacts in smooth gradients, and is liable to ruin your finely crafted pixel-art.


For more information on Block Compression and how it works, check out Joost van Dongen’s development blog here. It includes a fantastic visual breakdown of how color data is removed.
Here is a quick overview of the Block Compression formats available in Unity, and a practical use-case for each:
DXT1|BC1: The most effective format at a 6:1 compression ratio for textures without an alpha channel. Good for albedo/diffuse textures.
DXT5|BC3: Just like BC1, but with the addition of an 8-bit alpha channel. Very useful if (like me) you like to keep transparency masks within your albedo’s alpha channel.
BC4: A grayscale format just like BC1. Useful for single channel masks (roughness, specular, metallic etc.)
BC5: A two-channel format optimized for use with normal maps, but of limited use otherwise. Flow maps, maybe!
BC6H: An RGB format designed specifically for HDR images.
Check out my cheat sheet for more information on how these formats compare.
Ericsson Texture Compression (ETC)
A common compression format that is supported on most mobile devices.
ETC and ETC2 are ubiquitous block-based texture compression formats for mobile devices. They are the default compression formats for the Android platform.
PowerVR Texture Compression (PVRTC)
A very efficient compression method designed for mobile devices.
PVRTC is a more modern compression format that works by capturing two low resolution versions of your image, upscaling them, and then blending them back together. This method can provide a very high fidelity image for the size of the image file it produces.
Unlike the rest of the compression formats in this list, PVRTC is not block-based so you won’t get those square-shaped artifacts inherent to the format. For more information, you can read the creators of PRVTC explain it in their own words here.
PRVTC is the default compression format for the iOS platform.
Adaptive Scalable Texture Compression (ASTC)
A block-based format with a large degree of customizability.
The ACTC format was designed with the intent to give developers greater control over that sliding scale between quality and file size.
In Unity you’re given the choice between using blocks of 12×12, 10×10, 8×8, 6×6, 5×5 or 4×4 pixels. The larger the block, the smaller the file size but the larger the compression artifacts will become. For a more detailed comparison between different block sizes, you can find more information here.


ACTC is the default compression format for the tvOS platform.
Watch this space!
Thanks a lot for reading my article on texture compression formats in Unity. It’s been the result of a lot of research and experimentation both online and within the engine itself.
If you’re interested in learning more about compression formats, the Unity Documentation has a very comprehensive list of formats by platform which can be accessed here.
Topics to cover in future updates to this article:
- The impact of mipmapping
- HDR compression images
- Resizing algorithms
- Crunch compression (now its very own techarthub article!)
As always with articles on techarthub, there has been a lot of opportunities to get things completely wrong. If you’ve spotted any incorrect or inconsistent information please don’t hesitate to let me know. You’d be doing us all a service, and I really appreciate the corrections that get sent in.
Thanks!


