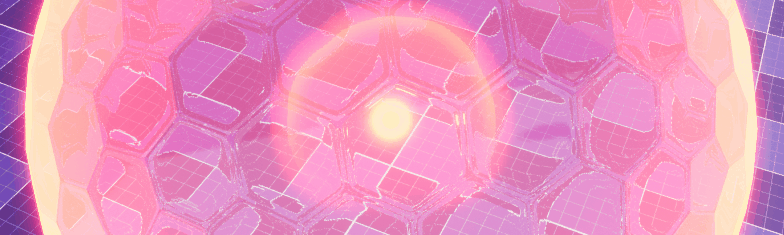
The Ring Pulse is one of the most versatile components in your VFX toolkit, helpful in the creation of a whole range of effects including explosions, shockwaves, starship engines, and interface prompts. Just to name a few.
You may be surprised at just how often they feature in games of all styles and genres, and once you start noticing them you’ll never be able to stop. They’re everywhere, and for good reason!
In this tutorial we’re going to create a Material-based Ring Pulse effect using Unreal Engine 5. With a focus on customizability we’ll develop a versatile pulse that will work with Niagara particle systems, static meshes, or billboards, and can be easily adapted to fit your own projects.
Download the Unreal project
This is the fourth part of my ongoing series Creating a Halo-inspired Bubble Shield for Unreal Engine 5.If you would like to access to the source files from this series I would like to invite you to subscribe to my Patreon, where you will be able to download them alongside content from all current and future techarthub tutorials.
Unlike some of the previous entries in my Bubble Shield series, this is a completely standalone tutorial. You won’t need to have seen or read any other parts of the series to follow along, although I do highly recommend checking my other tutorials out if you have the chance!
That’s the sales pitch out of the way, on with the show.
Importing the textures
The ring pulse effect relies on two textures, one which defines the various ring shapes we’ll use to customise its appearance, and a normal map that’s used to distort them.

Red

Green

Blue
T_RingPulse_M is a packed texture of three different ring shapes. I’ve separated them into individual channels like this so when it comes to fine-tuning the effect we can individually set the intensity of each part in our Material. We’ll be using this texture as a mask, so don’t forget to set it to the Mask profile in your Compression Settings.

Red

Green

Blue
T_RingPulse_N consists of two different noise textures filling the Red and Green channels of a normal map. These textures will define the shape and quality of the distortion effect, so I encourage you to play around with different shapes and see what you get.
Further reading
In Unreal Engine the blue channel of a Normal Map is removed during the compression process and reinserted programmatically to save memory/disk space, which is why it’s blank here. For more information on this process check out my Guide to Texture Compression in Unreal Engine.
I made these textures in Substance Designer to justify the huge expense Adobe inflicts upon me every month, but they can just as easily be made in Photoshop or the open-source image authoring software of your choice.
Creating the assets
The first asset we’re going to create is a new Material called M_RingPulse. We also need to create a new Material Function called MF_PulseTime. We’ll leave these as they are for now and get back to them once we’ve made some Niagara FX assets.
This effect doesn’t necessarily have to use a particle system as the Material we’re going to create can be applied to both a billboard or static mesh (anything with UV coordinates, really), but particle systems are quick and cheap and will let us fire our Ring Pulse at any location on demand so we’ll be using them for the purposes of this tutorial.

I called mine N_RingPulse_Emitter and N_RingPulse_System because I lack imagination.
As nearly all of this effect will be controlled from the Material all we need to do here is make sure that the system is spawning a particle of the right size and lifetime. To do that, jump into the Emitter and add a new Spawn Burst Instantaneous component in the Emitter Update section, and set its value to 1.

Once that’s done, jump to the Initialize Particle section and set your particle’s Lifetime and uniform Sprite Size to something appropriate to your project. I set my particles to live for 1 second with a Sprite Size of 512.

Moving to the Sprite Renderer section, just make sure your new M_RingPulse Material has been applied in the emitter’s Material slot.

The only thing left on the particle side of things is to jump into the N_RingPulse_System and add our Emitter. You may also want to consider changing its Loop Duration in the System State settings.
Consider how you want your Ring Pulse to loop, and remember that if you set your Loop Duration to less than your Emitter’s Lifespan more than one Ring Pulse will be active at a time.
MF_PulseTime
Before we get into making the Material proper we need to define what drives the effect’s animation.
If we want to use a particle system we’ll be using a node called ParticleRelativeTime, which is a value that goes from 0 to 1 over the course of a particle’s lifespan. However, if we want to use a billboard or static mesh this value won’t exist so we’ll need to use a different method of setting the time over which the ring will animate.
This is all a long-ish way of saying we need a little Material Function to declare how the Ring Pulse will animate based on how it’s intended to be used.

By default I’ve set the UseParticleTime parameter to true, but if you set it to false you’ll be able to apply the ring effect to non-particle assets. This setting is also helpful when playing around in the Material Editor or Instance Window, as ParticleRelativeTime doesn’t exist in there either.
M_RingPulse
It’s time to finally make our Material. Here is an image of the entire graph shrunk down to fit the page.
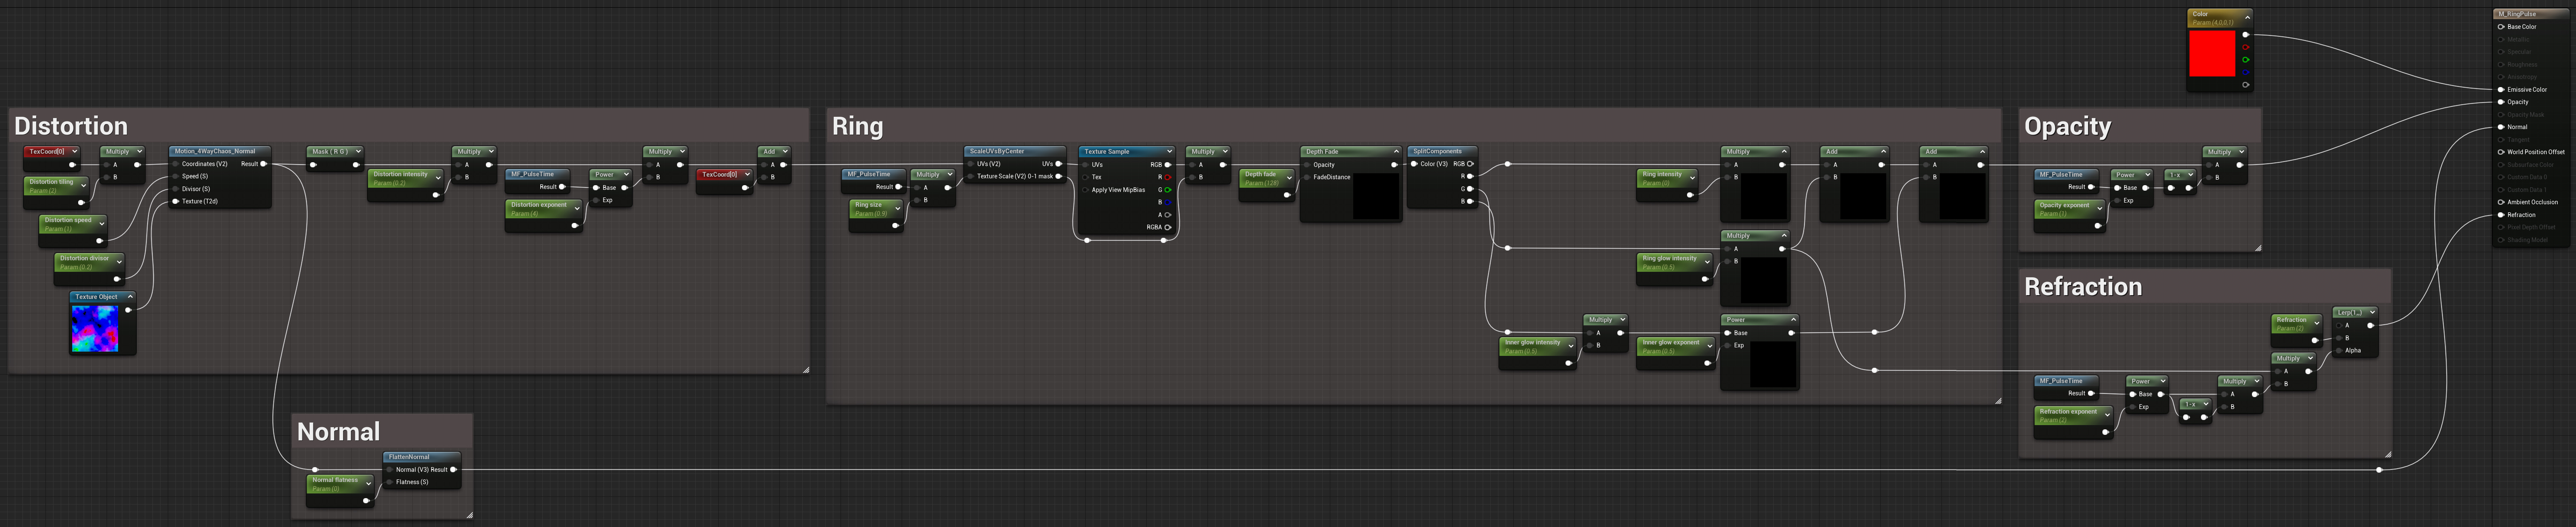
Let’s break it down starting from the left and working our way back to the Main Material Node.
Distortion
This section is where we create and animate the UV distortion you’ll observe as the ring pulse dissipates.
We feed our T_RingPulse_N texture into an engine-default Material Function called Motion_4WayChaos_Normal, which creates a roiling turbulence that we can use to distort our texture coordinates.
to a sample texture.
In this section we also use our MF_PulseTime function to control the distortion over time. We are using a Power node here, where the higher the exponent the later in the pulse the distortion will appear. We use this same technique more than once in the Material for different parts of the effect.

Ring
This is where we create and animate our ring shape. We use another of the MF_PulseTime nodes to increase the size of the ring over the duration of the pulse, and we feed our distorted coordinates into our T_RingPulseM texture.
From there we split out each channel so we have direct control over each part of the effect individually. These are (once again) going to be values you’ll want to play around with to get the effect you want. For my purposes I wanted the ring to be really strong and the outer/inner glows to be much softer.

We also use a DepthFade node here just so if the particle intersects another mesh it doesn’t jarringly clip through. If you’re not familiar with this super useful Material Node I recommend checking out its Unreal Engine documentation page for more context.
Opacity
We use another MF_PulseTime node here to fade the ring out over the duration of the pulse.
Refraction & Normal
In the Refraction section we multiply the output of MF_PulseTime by the additive inverse of itself, which means the refraction effect will be strongest in the middle and fade out at either end of the animation.
In this version of the Material I am using just the Ring Glow part of the texture for refraction. This is because it’s the softest part of the texture and will create a smoother transition. Harsh transitions can make refraction look jagged, which isn’t the look I’m going for.
Wrapping up
With your Material compiled and saved you should be able to see your Ring Pulse in action by dragging the Niagara system into your level. If you’d like to see it on a plane make sure to set your Pulse Time settings to not use particle time, and drag the Material onto your static mesh instead.
Thanks a lot for reading through my tutorial. I hope you’ve already thought of several ways you might be able to apply this technique to your own projects. It’s a really simple VFX sketch, but often it’s the simple solutions that have the most potential.
Bonus content!
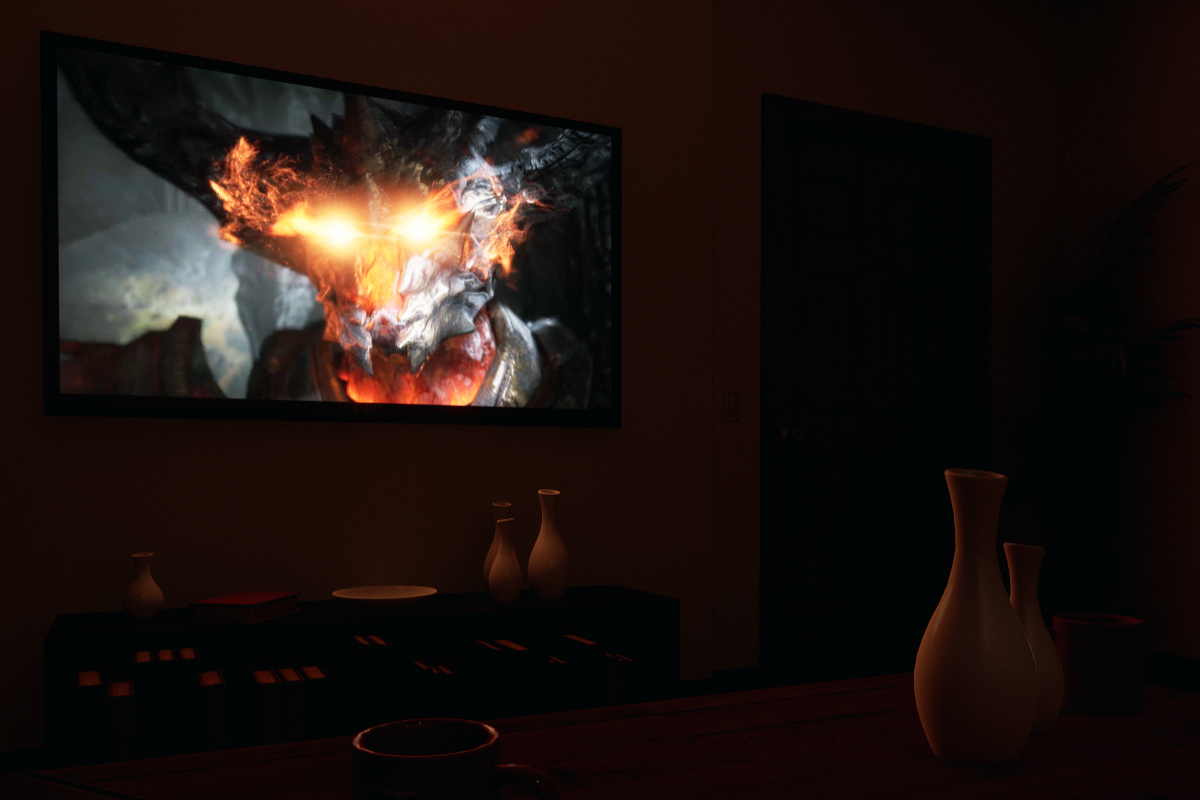
I’ve been playing through God of War in recent weeks, and I noticed our friend the Ring Pulse being used to denote enemy attacks that Kratos can either block or parry. I couldn’t resist having a quick go at recreating this effect using the Bubble Shield Material setup.
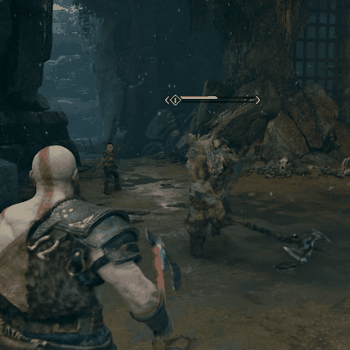
If you’d like to mimic this behaviour all you need to do is attach your Niagara system to the arm or weapon of your enemy character, and use settings similar to these: